Planning and Sowing Your Herb Garden
Spring is calling, and there’s no better time to start planning and sowing your herb garden – whether you have a sunny balcony, a few pots on a windowsill, or a full backyard plot. Your herb garden truly begins with seeds. Taking the time now to map out what to sow, when, where, and how many plants you’ll need will save you headaches later and give you a beautiful, productive space all season long.
Step 1: Plan Before You Plant
The secret to a thriving herb garden is planning. Ask yourself: Do I want a compact balcony setup or a full ornamental herb garden with dedicated beds? Even in tiny spaces you can grow an impressive collection – herbs are incredibly forgiving and productive.
Key factors to consider when creating your plan:
- Light needs: Which herbs crave full sun (like rosemary, thyme, and lavender) and which prefer partial shade or full shade (like mint, lemon balm, and parsley)?
- Soil requirements: Mediterranean herbs love sandy, well-draining soil; moisture-lovers like mint and basil need richer, more nutrient-dense earth.
- Watering habits: Some herbs are drought-tolerant once established; others want consistent moisture.
- Companion planting: Pair herbs that support each other (basil loves tomatoes, chives keep aphids away from roses).
- Aesthetics & timing: Think about bloom colors, heights, and how the garden will look through the seasons – calendula adds bright orange pops in summer, echinacea stands tall into autumn.
Pro tip from my own learning curve: I always underestimated how much space each herb actually needs and how many containers I’d require. Make a detailed list of every herb you want, decide quantities, then sketch a simple blueprint of your space (pots, beds, balcony layout). Mark sun/shade zones throughout the day and note soil types per area.
For in-ground gardens, group herbs with matching soil and light needs together. Never plant a drainage-loving Mediterranean herb in the same bed as thirsty mint unless you’re using containers to separate them. And remember: mint and thyme love to spread – plan to contain mint or give it room to roam!
Don’t forget soil planning even for garden beds. Some herbs need a sandy mix mixed in; others want compost-rich soil. Having this blueprint ready makes every later step smoother.
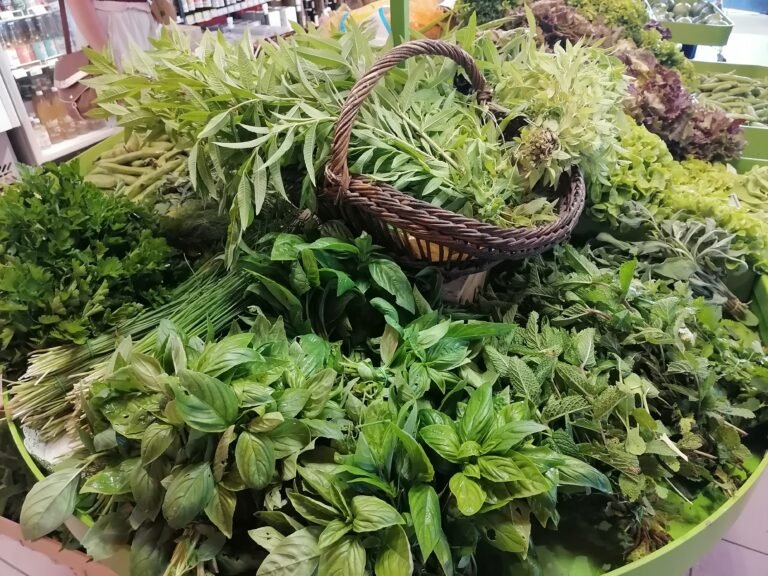
Step 2: Choosing Your Seeds
Once your plan is ready, it’s time to pick seeds. I always choose heirloom and organic varieties. Supermarket seeds can sometimes be genetically modified, and supporting heirloom species helps protect biodiversity.
Every seed packet includes clear instructions – follow them! They tell you exactly when to sow (especially in relation to last frost), how deep, and what light, soil, and water the variety prefers.
Step 3: Preparing Your Seedling Pots
You have lots of eco-friendly and budget-friendly seedling pot options for starting herb seeds:
- Classic seedling trays with small cells (great for starting many varieties at once)
- Biodegradable coconut fiber pots (perfect because you can plant them straight into the ground later)
- Homemade newspaper pots (non-toxic and free!)
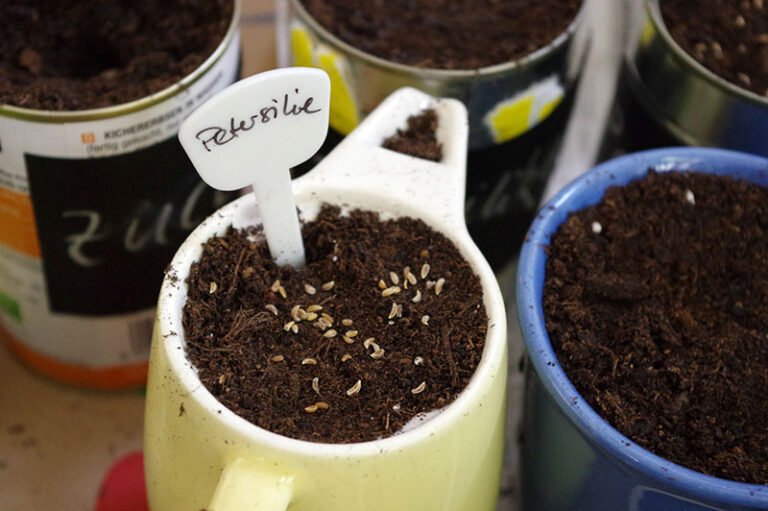
- Recycled containers: old tin cans, ceramic mugs, or cut-up plastic bottles – just add drainage holes
- Regular pots (fine, but you’ll probably need to upsize later)
One thing I learned the hard way: tiny peat tablets or small seed pots are convenient at first but quickly become too cramped. Herb seedling roots grow fast – faster than you expect – so choose containers that give them a little breathing room from day one.
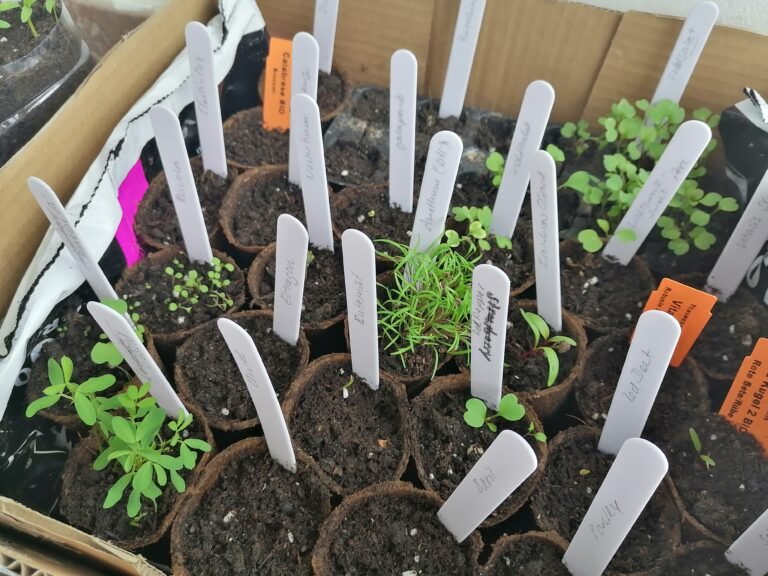
Also, prepare labels at this point for every single herb you are planning to sow.
Step 4: The Sowing Process
Follow each seed packet’s depth instructions carefully – most herb seeds only need 1–2 cm of soil, some sit right on top and get a light dusting, while others go a bit deeper.
Simple sowing steps:
- Make a small hole with a stick or pencil.
- Drop in the seed (use several for basil and similar herbs that like company).
- Cover gently and press the soil lightly.
- Water carefully so you don’t wash seeds away.
Step 5: Soil, Water, Light & Warmth
Soil: Skip standard potting mixes – they often contain too much fertilizer and can “burn” delicate seedlings. Use a dedicated seed-starting or herb-specific mix, or make your own with basic garden soil or compost plus coconut coir and perlite for perfect drainage and aeration. (Vegan soil options exist too – many commercial “organic” soils contain fish blood, bone meal, or manure. Personally, I am also no friend of manure, not only for vegan reasons, but because of potential contamination, hormones, and bacteria.)
Water: Keep the soil consistently moist but never soggy. Tiny herb seedlings dry out in minutes, but overwatering leads to damping-off. Always use pots with drainage holes and add a layer of stones or broken pottery at the bottom.
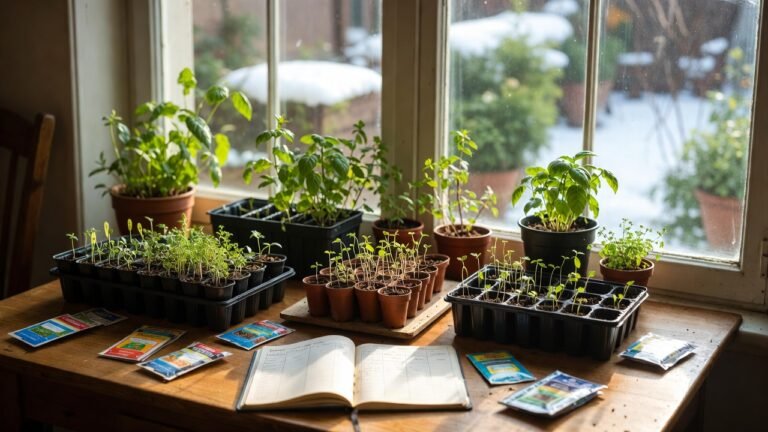
Light & Warmth: Most herbs need bright light and consistent warmth to germinate. A sunny windowsill, balcony, or mini greenhouse works beautifully. If you’re starting indoors, grow lights are a game-changer.
Step 6: Monitor, Label & Track All Herbs
As your herb seedlings grow, keep an eye on them and plan their move into bigger pots or the garden. This is where labeling becomes essential.
The worst thing that can happen? Forgetting what you planted where. You think you’ll remember… until you don’t. When seedlings are tiny, they all look alike, and it’s easy to confuse them with weeds later.
The Calendula Herb Academy (that’s us) offers a digital herb seed tracker in form of an interactive google sheet to plan and track your seedlings, with all information needed. We also offer herb labels for your seeds.
I learned this lesson dramatically one year when a storm knocked over my mini greenhouse. Pots flew everywhere, soil mixed together, and suddenly I had no idea which seedling was which. I rescued most of them, but the chaos made transplanting stressful because I couldn’t match each plant’s needs (sun, space, soil) properly. Proper labels and tracking prevent exactly that kind of drama!
Ready to Start Your Herb Story?
Your herb garden adventure begins today – with a solid plan, the right seeds, and a little love. Grab your notebook, sketch your blueprint, and get sowing. In just a few weeks you’ll have healthy seedlings ready to move into their forever homes.
Whether you’re growing on a tiny balcony or designing a show-stopping ornamental herb bed, starting from seed gives you the most rewarding (and cost-effective) results.
Happy sowing! 🌱 Let me know in the comments which herbs you’re starting this season – I’d love to hear your plans.
The Calendula Herb Academy – where herb lovers grow together.